Valve Replacement
To replace the valve, you will need: Valve Cleaner, a new Valve for the Applicator, and 2 holding screws.
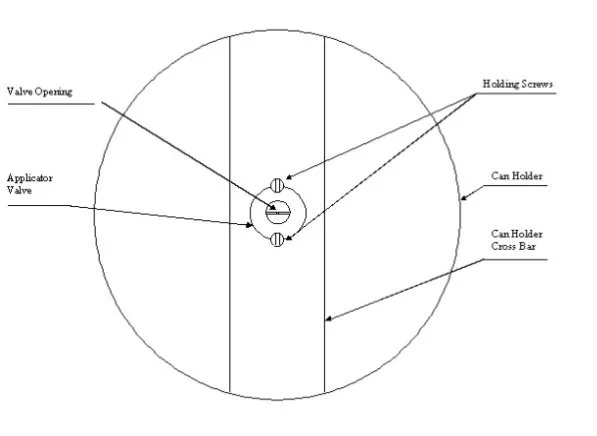
When replacing the spray valve in your paint applicator, ensure the valve is positioned as shown below, with the valve opening horizontal to the can holder cross bar.
Start by removing the 2 holding screws to detach the plugged valve from the applicator. Then, install the new valve and secure it with the 2 holding screws. Be sure to test the valve for wide lines using the Valve Cleaner to ensure proper function.
Always remember:
Never use nails or paper clips to clean your valve, as this can widen the opening and cause your lines to become narrow. Instead, use toothpicks or an old toothbrush to remove any old paint.
Be sure to use Valve Cleaner after every use. For the best results, spray Valve Cleaner through the valve after each use or after every 8 cans of paint. Wipe away any excess paint with a cloth.
Fast Stripe Paint has a 2-year shelf life from the date of purchase. Each can will empty fully without clogging during this period. If any can malfunctions, contact Fast Line immediately for a free replacement shipment.